DevEnjoy

One Step Closer

Spring boot

Spring Security 동일 session 제어

2018년 4월 25일 by YongPwi Leave a Comment

spring security를 사용하여 로그인 관리를 할때 동일 session에 대한 제어 처리 부분 삽질,,,

동일 session을 허락하지 않게 설정을하는데 설정은 잘 먹는다.

하지만 설정 이후에 logout을 해도 session이 삭제되지 않는다.

머지,,, 찾아보니 spring security 3.2.4 버전에서 문제가 있었다고 한다.

나도 하도 짜증나서 디버깅으로 찍어보니 AbstractAuthenticationProcessingFilter의 doFilter(ServletRequest req, ServletResponse res, FilterChain chain) method 실행중 sessionStrategy.onAuthentication(authResult, request, response); 부분에서 에러가 발생하였다.

해당 method는 CompositeSessionAuthenticationStrategy의 onAuthentication method에서 session 체크시 로그아웃한 session이 삭제되지 않아서 발생한 문제이다.

1
2
3
4
5
6
7
8
9
10
public void onAuthentication(Authentication authentication,
            HttpServletRequest request, HttpServletResponse response)
                    throws SessionAuthenticationException {
        for (SessionAuthenticationStrategy delegate : this.delegateStrategies) {
            if (this.logger.isDebugEnabled()) {
                this.logger.debug("Delegating to " + delegate);
            }
            delegate.onAuthentication(authentication, request, response);
        }
    }

왜 이런 문제가 발생하나 엄청나게 구글링을 했지만 딱히 방법이 없었다.

국내 블로거분께서는 spring security 3.2.7 이상을 사용시 해결되었다고 했는데 우리 환경은 4버전 이상이여서 해당 문제는 아닌것 같았다.

물론 방법은 찾았다.

spring boot에서 HttpSessionListener 관련 설정 내용에 대한 언급이 없어서 해외 개발자가 이슈로 등록했는데 받아들여지지 않은것 같다.

1
2
3
4
5
6
7
8
9
10
11
12
// web.xml에 하위 리스너를 선언하고 사용하는 방식
<listener>
    <listener-class>session.destory.servlet.SessionManagerListener</listener-class>
</listener>

// spring boot에서 bean annotation으로 선언하고 사용하는 방식
// 해당 bean 내용을 spring WebSecurityConfigurerAdapter를 extends한 class(WebSecurityConfiguration)
에 등록하고 사용하였다.
@Bean
public ServletListenerRegistrationBean<HttpSessionEventPublisher> httpSessionEventPublisher() {
    return new ServletListenerRegistrationBean<HttpSessionEventPublisher>(new HttpSessionEventPublisher());
}

상위 처럼 설정하면 logout시 spring security 내부적으로 session을 삭제처리 된다.

참고링크

https://github.com/spring-projects/spring-boot/issues/2518

http://zgundam.tistory.com/62

Posted in: Java, Programing, Spring Tagged: Spring, Spring boot, Spring Security

Spring @Mock, @Mockbean, @InjectMock

2018년 4월 17일 by YongPwi Leave a Comment

@Mock : (org.mockito.Mock)
import org.mockito.Mockito;
…
MyService myservice = Mockito.mock(MyService.class);

mockito에 포함

Mock 객체를 생성한다.

@Mockbean : (org.springframework.boot.test.mock.mockito.MockBean)

Spring boot test에 포함

Spirng ApplicationContext에 Mockito mock 객체를 추가 할 수 있다. Mock은 type이나 bean 이름별로 등록 할 수 있다. ApplicationContext에 정의 된 동일한 type의 bean이 존재하면 Mockito mock으로 선언한 mock bean으로 대체된다. 존재하지 않는 경우는 새 bean이 추가된다.

@InjectMock
class의 instance를 생성하고 @Mock(도는 @Spy) annotation으로 생성된 mock instance를 class의 instance에 주입한다. 이 mock instance를 초기화하고 주입하려면 @RunWith (MockitoJUnitRunner.class) 또는 Mockito.initMocks (this)를 사용해야한다.

1
2
3
4
5
6
7
8
9
10
11
12
13
14
15
16
17
18
19
@RunWith(SpringRunner.class)
public class UserServiceTest {

    @InjectMocks
    UserService userService;

    @Mock
    UserRepository userRepository;

    // userRepository는 userService에 주입된다.
    // 하위 코드 같은 관계를 가지고 있다.

    private UserRepository userRepository

    public UserService(UserRepository userRepository){
        this.userRepository = userRepository;
    }

}
Posted in: Java, Programing, Spring Tagged: InjectMock, Mock, Mockbean, Spring, Spring boot

Spring @WebMvcTest와 @SpringBootTest 차이 (Spring Security 관련 설정)

2018년 4월 13일 by YongPwi Leave a Comment

Spring Boot(1.4X)에서 Unit Test를 적용하다 어마무시하게 삽질을 하였음

Spring Boot에서는 Unit Test를 위해서 여러가지 annotation을 제공하고 있다.

그중에서 내가 삽질한 @WebMvcTest와 @SpringBootTest 두가지에 대해서 정리

먼저 @SpringBootTest의 경우 일반적인 테스트로 slicing을 전혀 사용하지 않기 때문에 전체 응용 프로그램 컨텍스트를 시작한다.

그렇기 때문에 전체 응용 프로그램을 로드하여 모든 bean을 주입하기 때문에 속도가 느리다.

@WebMvcTest의 경우는 Controller layer를 테스트하고 모의 객체를 사용하기 때문에 나머지 필요한 bean을 직접 세팅해줘야 한다.

그렇기 때문에 가볍고 빠르게 테스트 가능하다.

문제는 여기서부터 발생했다.

@WebMvcTest를 사용하여 테스트 시도시 spring security를 사용하는 경우 기본 spring security 설정을 로드한다.

WebSecurityConfigurerAdapter 추상클래스를 extends하여 customWebSecurityConfiguration(클래스명은 만들기 나름)를 사용하는 경우

customWebSecurityConfiguration에 선언된 url filter 부분을 등록 시켜주어야 한다.

이부분 때문에 몇일을 삽질했다.

1
2
3
4
5
@RunWith(SpringRunner.class)
@WebMvcTest(controllers = {UserController.class}, secure = false)
public class UserControllerTest {

}

물론 상위 code와 같이 @WebMvcTest에 secure = false 옵션을 주면 spring security 인증이 타지 않고 테스트를 진행한다.

하지만 이 방식은 내가 원하던 방식이 아니였다.

해당 부분에 대해서 spring boot project에서도 이슈로 논의되어 2.0 에서는 먼가 개선 예정이 있는것 같다.

https://github.com/spring-projects/spring-boot/issues/6514

관련 내용은 상위 이슈 링크를 확인 하시길,,,

그래서 해결을 어찌했냐면,,,

1
2
3
4
5
6
7
8
9
10
11
12
13
14
15
16
17
18
19
20
21
22
23
24
25
26
27
28
29
30
31
32
33
34
35
36
37
38
39
40
41
42
43
44
45
46
47
48
49
50
51
52
53
54
55
56
57
58
59
@RunWith(SpringRunner.class)
// 요 부분이 key!!!
@WebMvcTest(controllers = {UserController.class}, includeFilters = @ComponentScan.Filter(classes = {EnableWebSecurity.class}))
public class UserControllerTest {

    @Autowired
    private MockMvc mvc;

    @MockBean
    LoggedUserManager loggedUserManager;

    @MockBean
    UserService userService;

    @MockBean
    UserDetailsService userDetailsService;

    @Autowired
    private ObjectMapper objectMapper;

    @Test
    @WithMockUser(username = "yongpwi",authorities = {"USER","ADMIN"})
    public void create() throws Exception {
        given(loggedUserManager.getUser()).willReturn(normalUser());
        String userJson = objectMapper.writeValueAsString(new User( "yongpwi@devenjoy.com", "yongpwi", "1111"));

        // when-then
        mvc.perform(
            MockMvcRequestBuilders.post("/user/createUser")
                .contentType(MediaType.APPLICATION_FORM_URLENCODED)
                .content(userJson))
            .andExpect(MockMvcResultMatchers.status().isOk())
            .andExpect(MockMvcResultMatchers.content().contentType(MediaType.APPLICATION_JSON_UTF8))
            .andExpect(MockMvcResultMatchers.jsonPath("$.resultCode").value(1))
            .andExpect(MockMvcResultMatchers.jsonPath("$.comment").value("SUCCESS"));
    }

    @Test
    @WithMockUser(username = "yongpwi",authorities = {"USER","ADMIN"})
    public void list() throws Exception {
        List<User> userList = asList(
                new User( "yongpwi@devenjoy.com", "yongpwi", "1111")
        );
        given(userService.search(any(UserDto.Response.class))).willReturn(userList);

        mvc.perform(MockMvcRequestBuilders.get("/user/list")
            .contentType(MediaType.APPLICATION_FORM_URLENCODED)
            .param("userEmail", "yongpwi@devenjoy.com"))
        .andExpect(MockMvcResultMatchers.status().isOk())
        .andExpect(MockMvcResultMatchers.view().name("user/list"));
    }

    private User normalUser() {
        User user = new User();
        user.setRole(Role.USER);
        user.setUserName("yongpwi");
        return user;
    }
}

상위 코드와 같이해서 테스트 환경 설정을 하였다.

1
@WebMvcTest(controllers = {UserController.class}, includeFilters = @ComponentScan.Filter(classes = {EnableWebSecurity.class})

요 부분인데

includeFilters = @ComponentScan.Filter(classes = {EnableWebSecurity.class}

sprig security 필터 부분을 추가해주면 된다.

EnableWebSecurity.class를 지정하게 되면 @EnableWebSecurity annotation 선언한 class를 load한다.

그리고 또 한 부분 챙겨할 부분이 customWebSecurityConfiguration를 구현할때 사용한 외부 bean들은 해당 test시 하단과 같이 @MockBean으로 선언해주어야 customWebSecurityConfiguration 설정할때 오류가 나지 않는다.

1
2
3
4
5
6
7
// customWebSecurityConfiguration에서 @Autowired 선언한 class들 선언

@MockBean
UserService userService;

@MockBean
UserDetailsService userDetailsService;

unit test 관련된 내용은 앞으로 꾸준히 정리 예정!

Posted in: Java, Programing, Talk Tagged: Spring boot, Spring Security, SpringBootTest, unit test, WebMvcTest

Spring boot view template(handlebars), static resource 갱신(without server shutdown)

2017년 7월 20일 by YongPwi Leave a Comment

이전까지 spring boot를 사용시에 webapp 폴더를 임의적으로 생성하여 그 하위에 view tempate, static resource를 설정하였다.

하지만 spring boot에서 가이드하는 방식은 resources 하위에 view template과 static resource를 설정하도록 권하고 있다.

그러므로 이전의 war 방식이 아닌 jar를 가이드하고 있기 때문이기도 한듯 싶다.

최근 jar 배포용 application을 만들다 보니 기존 설정 방식을 그대로 사용해서는

문제가 좀 발생하여 수 많은 삽질을 했다.

관련 내용을 차근차근 정리해 볼까 한다.

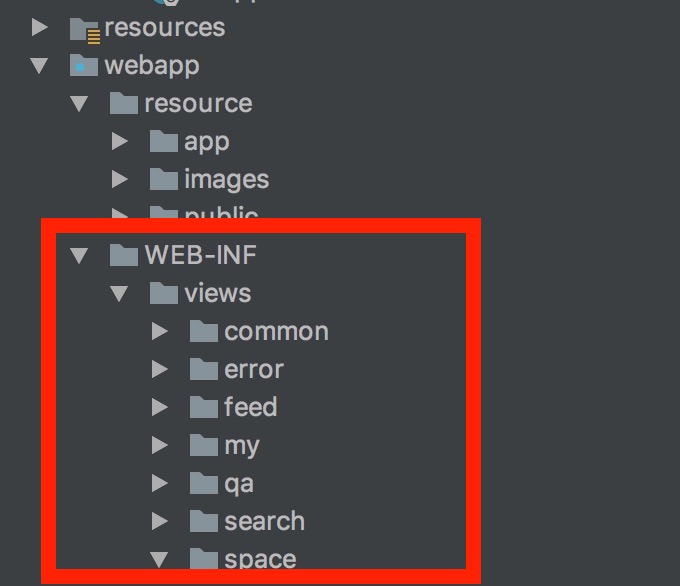
일단 jar 설정에서는 WEB-INF 하위에 view template이 존재 하지 않아서 매번 서버를 내렸다 올려야 화면 변경 내용이 확인 가능했다.

정말 미친듯이 귀찮다.

상위 방식은 기존 WEB-INF 하위에 view template 파일들이 있었지만

1
2
3
4
5
6
7
8
9
10
11
@Bean
    public HandlebarsViewResolver viewResolver() throws Exception {
        HandlebarsViewResolver viewResolver = new HandlebarsViewResolver();
        viewResolver.setOrder(1);
        viewResolver.setPrefix("/WEB-INF/views/");
        viewResolver.setSuffix(".hbs");
        viewResolver.setCache(false);
        viewResolver.registerHelpers(new HandlebarsHelper());
        viewResolver.registerHelpers(StringHelpers.class);
        return viewResolver;
    }

상위 처럼 handlebars의 경우 WebMvcConfigurerAdapter 상속받아서 상위 처럼

1
viewResolver.setCache(false);

설정하면 서버재시작 없이 브라우저 갱신하게 되면 변경 내용을 확인할 수 있었다.

하지만 jar 방식에서는 상위 방식 외에 다른 설정 방법이 필요하다.

– spring boot devtools 의존성 추가

관련 내용을 찾다보니 spring boot devtools 설정으로 해결 가능했다.

1
2
3
4
5
6
7
8
9
10
11
12
13
14
15
16
17
dependencies {
        compile('org.springframework.boot:spring-boot-starter-data-jpa')
    compile('org.springframework.boot:spring-boot-starter-jdbc')
    compile('org.springframework.boot:spring-boot-starter-security')
    compile("org.springframework.boot:spring-boot-starter-web")
    compile('com.github.jknack:handlebars-springmvc:4.0.6')
    compile('org.postgresql:postgresql:9.4-1201-jdbc41')
    compile('org.bgee.log4jdbc-log4j2:log4jdbc-log4j2-jdbc4.1:1.16')
    compile('org.projectlombok:lombok')
    testCompile('org.springframework.boot:spring-boot-starter-test')
    compile('org.codehaus.jackson:jackson-core-asl:1.9.13')
    compile('com.google.guava:guava:18.0')
    compile('org.modelmapper:modelmapper:0.7.5')

        // spring boot devtools dependency 추가
        compile("org.springframework.boot:spring-boot-devtools")
}

– spring boot 설정 변경( application.properties, application.yml )

운영 서버를 제외한 로컬 환경에만 적용하기 위하여 하위 처럼 설정한다.

1
2
3
4
5
6
7
8
9
// application.yml
spring :
     profiles: local
     devtools:
        livereload:
            enabled: true

// application.properties
spring.devtools.livereload.enabled=true

– IDE(intellij) 옵션 수정

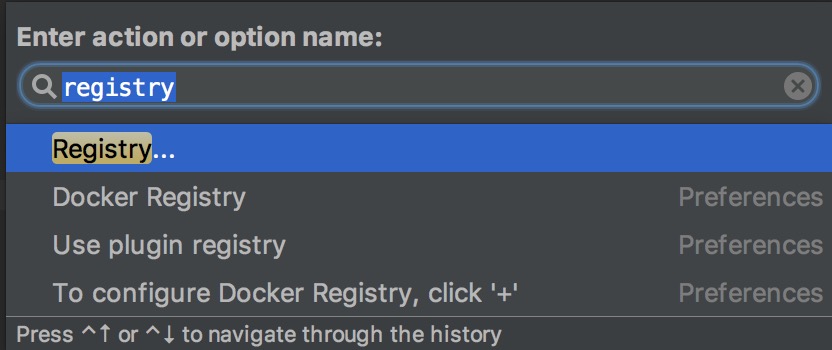
intellij > Help > find action > registry 검색

compiler.automake.allow.when.app.running 체크

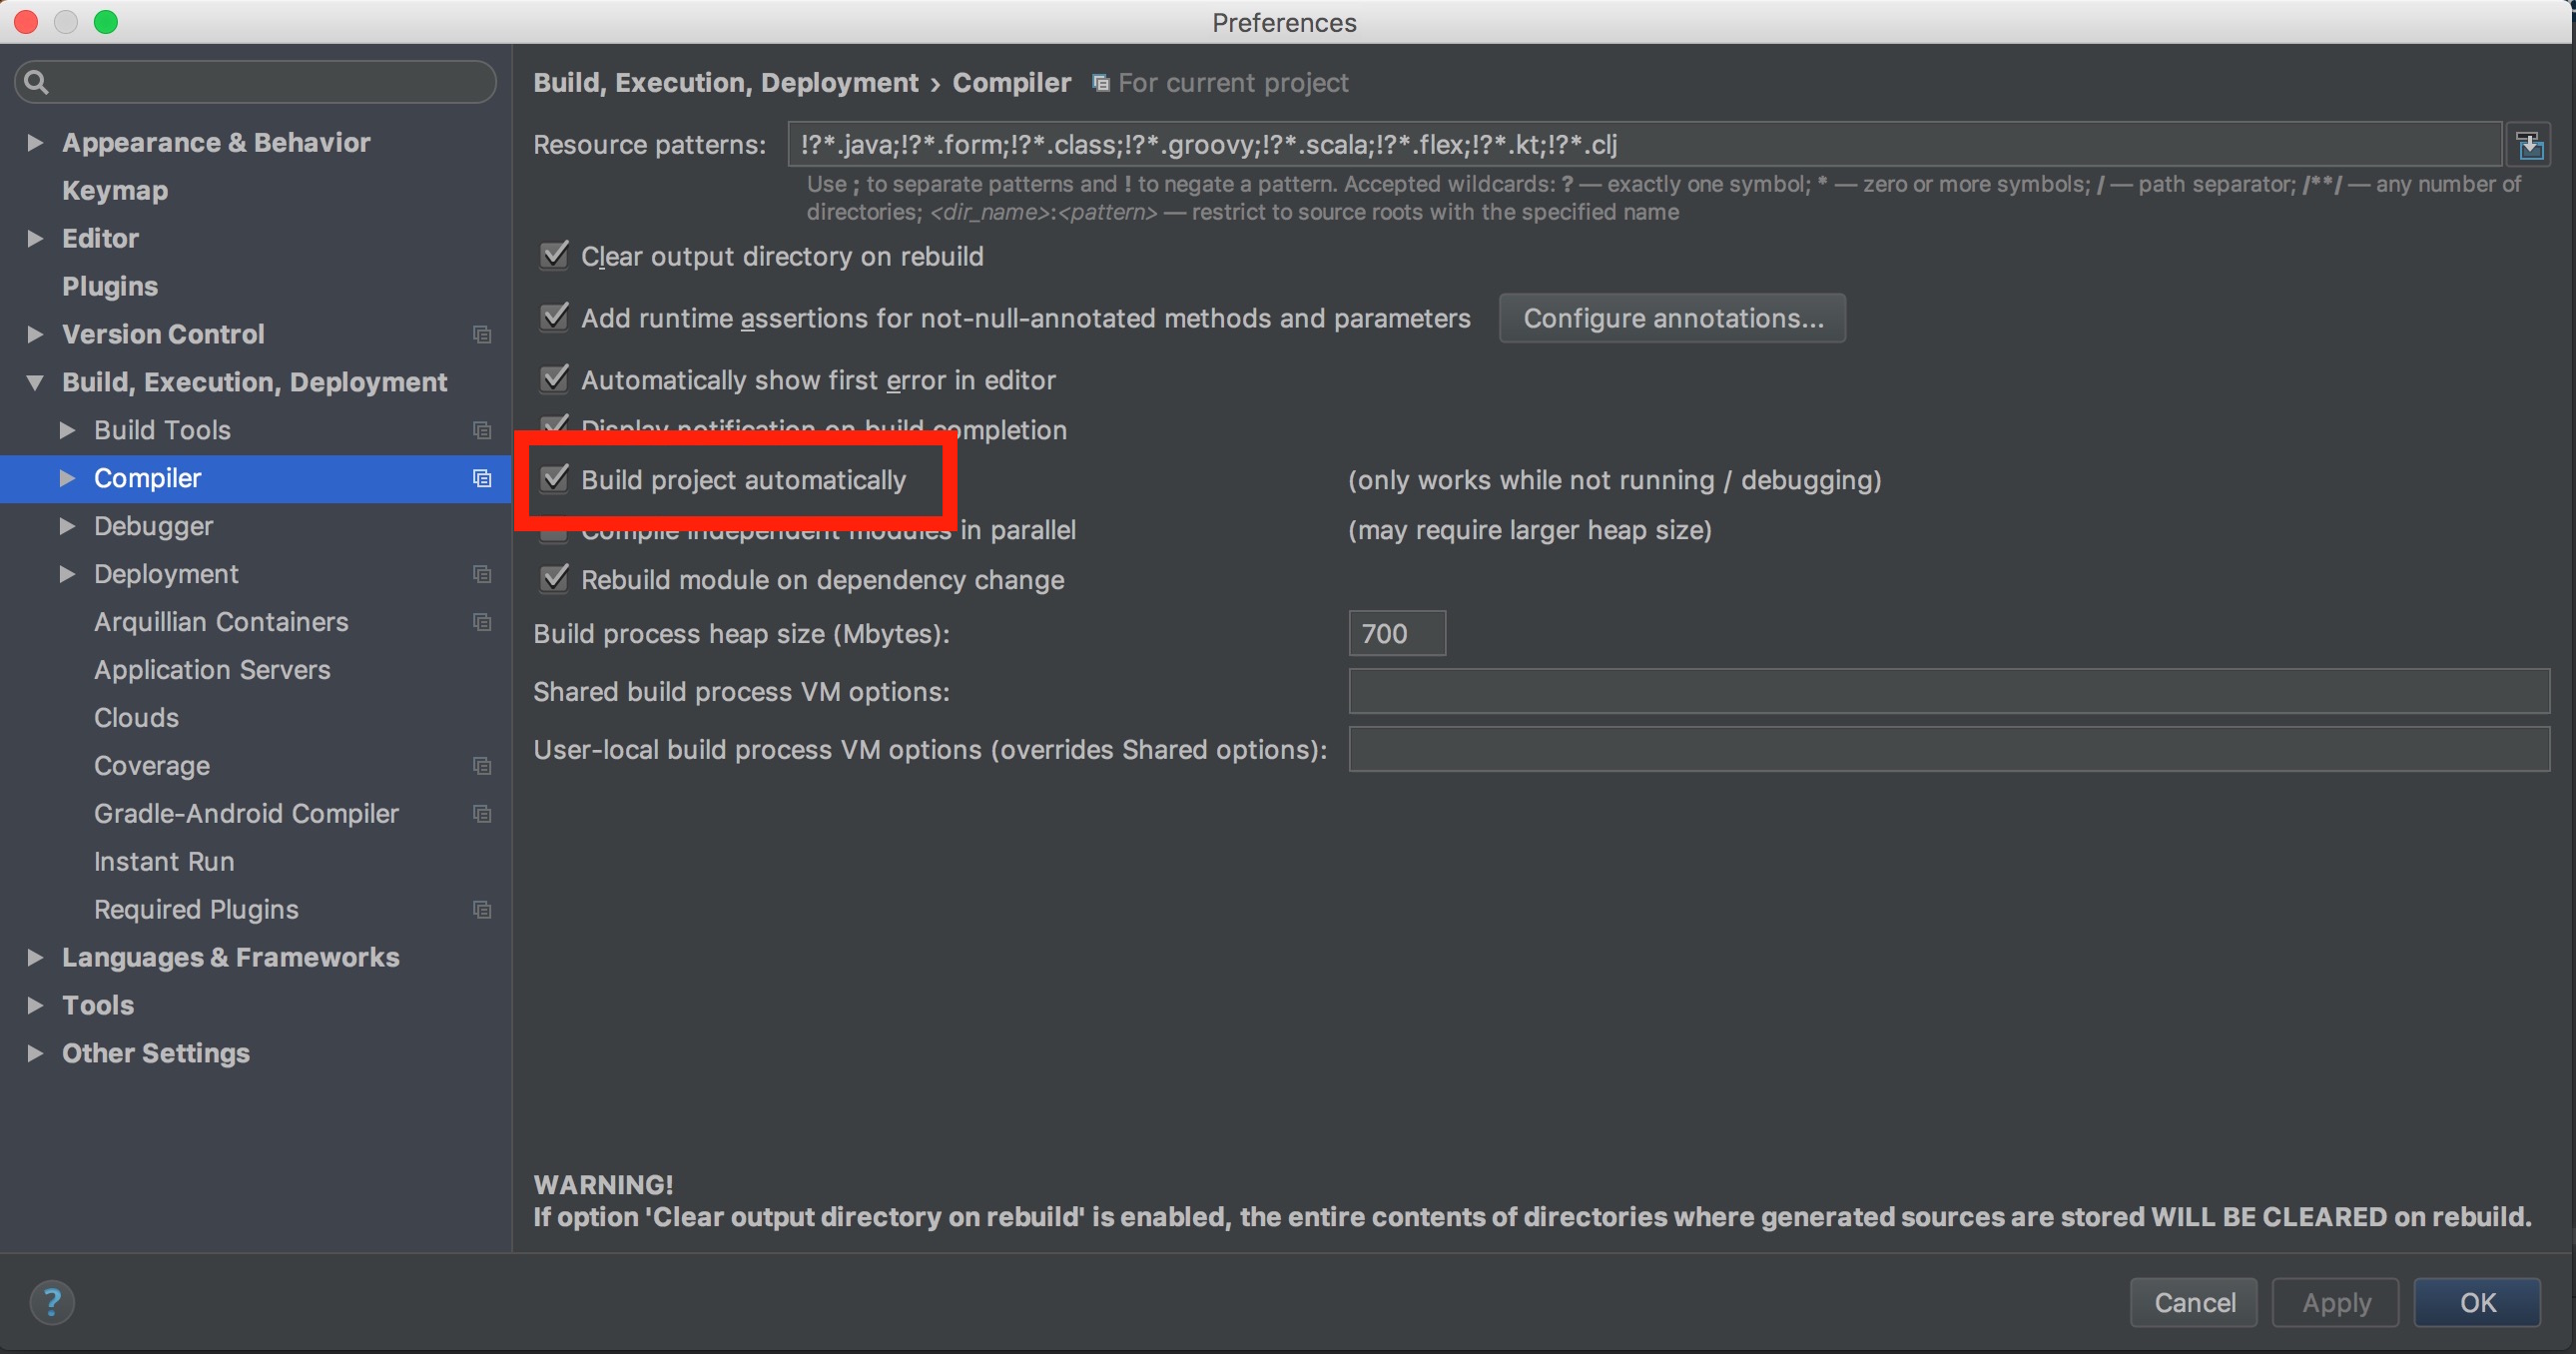
intellij > PreFerences > Build, Execution, Deployment > Compiler > Build proejct automatically 체크

상위까지 설정하고 서버 시작하면 그 이후에는 서버 재시작 없이 브라우저 새로고침만으로 view template 변경 적용되는 것을 확인 가능하다.

Posted in: Java, Programing, Talk Tagged: Handebars, JAVA, Spring boot, spring boot devtools

Calendar

7월 2025
일 월 화 수 목 금 토
« 4월    
 12345
6789101112
13141516171819
20212223242526
2728293031  

Recent Posts

  • ubuntu bastion 설정
  • Spring Boot properties 암호화
  • Git Repository Bitbucket과 Issue Tracker Redmine 연동 설정
  • Spring Security 동일 session 제어
  • Spring @Mock, @Mockbean, @InjectMock

Recent Comments

  • pzotov (Ubuntu 14.04에서 Sonarqube 6.7.1 service 등록)
  • cours de theatre paris (AWS ELB와 Auto Scaling 연동, nginx)
  • bayern munich (IntelliJ EAP Font rendering)
  • camiseta del chelsea (OS X에서 APP 아이콘 변경)
  • cheap football shirts replica (jQuery Ajax에서 json Array 직렬화)

Copyright © [the-year] [site-link].

Powered by [wp-link] and [theme-link].